Temperature/Humidity.

Both temperature and humidity matters, in aiding the growth of plants in any environment. If they are big enough, like trees and bushes both big and small, they will adapt, not because they want to, but because they have to. All of the trees and bushes you see, eventually grew and adapted to the weather changes, and you see this in the city, suburbs, and the countryside.

In places where it snows heavily in winter months, or even has that chill in the air, those trees and bushes wil adapt. Those same trees and bushes will adapt, in extremely hot temperatures also. What may influence lots of their growth is the humidity as well, and much of their adaptation is due to getting rain every now and again. They’ll be in the sun all year, but rain only arrives in short instances; some more than others. When I say short instances, I don’t mean only raining once a month. Some places that might be true, but generally, you will see it rain several times monthly, for certain areas more than others. Seattle is a place known for being somewhat gloomy and rains a lot.

I’ll focus on humidity first, despite the order of the topics in the title. You’ll see why I did it this way, in a moment. I may alternate from time to time, so bear with me.

When looking at indoor plants, you need to keep both in mind, when looking for your plants to grow properly, you need to monitor the humidity. Humidity may be both good, and bad, for plants. I’ll tell you why this is.

Humidity is designated in three or four categories, depending on your applications. If you have pets and plants, you can use the designated labels often found on humidity gauges found in pet stores (see hacks), which are desert, moderate, and tropical. For most people, the humidity gauges found in hardware stores and other outlets, you have designations such as very dry, dry, normal, humid, and very humid. Clearly, you know the equivalents for each, but how the humidity affects you, may affect some of your plants in a similar fashion.

For some plants, unless they are labeled tropical plants, you won’t have too many problems in normal conditions, and they will grow, especially if the temperature is good. In your home, if you can walk around comfortably with little to nothing on, that may be an indication of how comfortable some plants can be also. This isn’t the case for all plants, because some can handle very dry humidity, such as succulents and cacti.

The humidity does affect the temperature, which is why we often see things like, “real feel” temperature, or we would see and/or hear, “but it feels like”, which I personally hate, but there’s a purpose behind it. It does vary, so don’t think that hot temperatures always has high humidity, or cold temperatures always has low humidity. It’s not always the case. Just look at some examples in the United States, with Arizona and Florida, where Arizona, and many areas similar, like some parts of Texas, Nevada, New Mexico, and so on, may have low humidity, but the temperature can reach high in the triple digits at times. This is often referred to as a, “dry heat“. Florida is different, where the humidity can be in very high amounts, along with the temperatures. This is most likely because of the build of that state, where it’s a peninsula, pretty much surrounded more by water. You can look at the Northern areas like the New England areas, and New York state for example, where in the winter months, you will have colder temperatures, but the humidity may not be as low as you would expect. Why? Well, cold weather and low humidity (dry air) seem to go hand-in-hand. That cold weather can still retain quite a bit of moisture, especially when nearest to bodies of water, and intensify precipitations, such as snowfall, and other kinds of storms.

This part is much harder to explain, since I’m mostly referencing conditions indoors with plants.

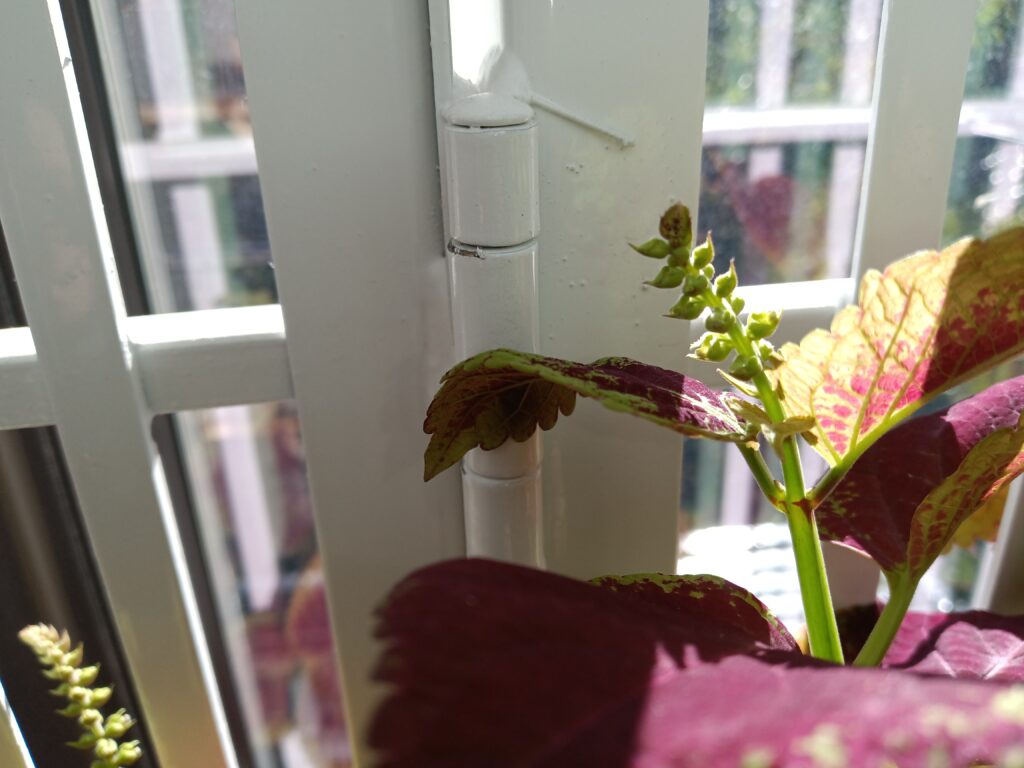
For my indoor plants, the temperature does matter, because in warmer weather, it can be dry, due to other factors, such as being several floors above ground level. Believe it or not, this can affect your home’s level of humidity. You may have to adjust it for personal comfort, and for the plants’ comfort. In some instances, you will need a humidifier, or something a bit more heavy duty, like an evaporative air cooler. This may be needed, especially if you are in an apartment, where the heating system can be a bit out of your control. I known this, and I experienced some plants drying up, because the heat was so much, it dried the plants out, and the soil it was in. It’s clear from that, the plants could not recover, no matter how hard I or my mother tried to recover them. This happened when me and my mom visited her brother overseas, for two weeks.

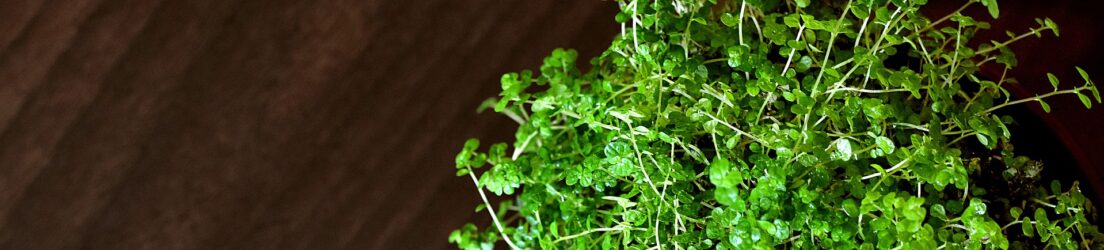
Temperature and humidity goes hand in hand, because it can make or break some plants. Some plants can be fickle, and want to be in a perfect setting, where the humidity isn’t too high nor too low, and the temperature is also not too hot nor too cold. I’ve experienced this with many plants, which is unfortunate, but it’s a learning experience like everything else.
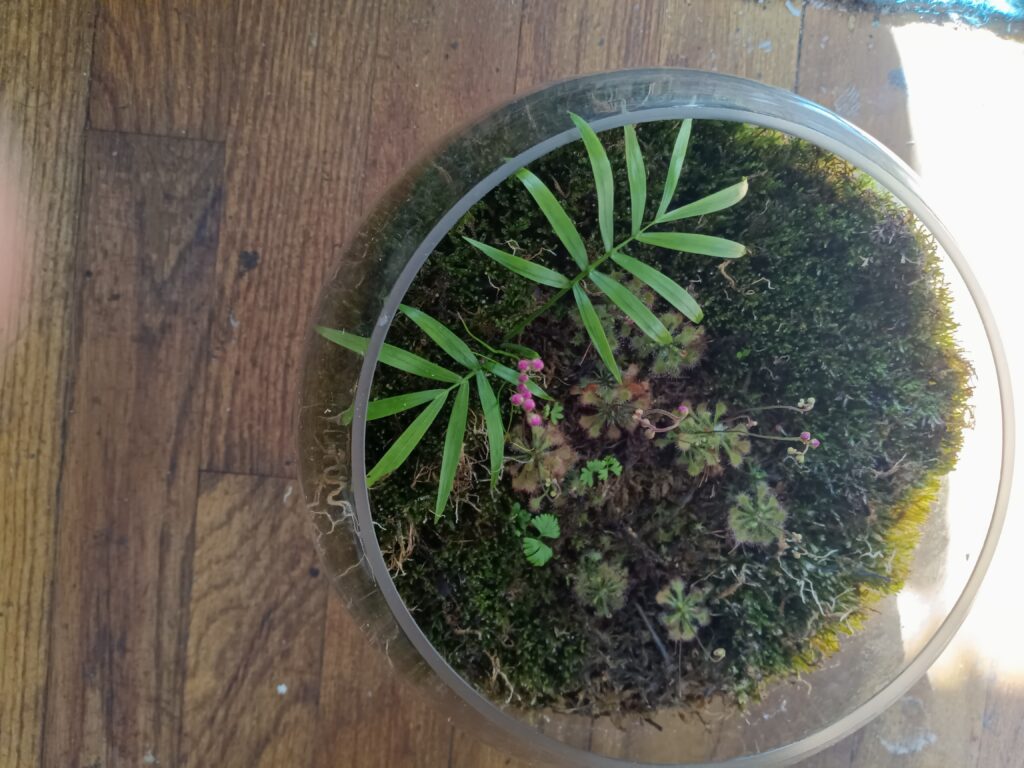
If you have the plants in the right environments, open air, or closed, you’ll aid in their growth, along with other factors, such as lighting. All of this helps, but what’s more important, in these scenarios? Lighting? Mediums? Water? Temperature? Humidity? Actually, it’s all of the above, and it’s not the same for all plants either, as most of us that have plants already know this to be true. For this journal, temperature and humidity will matter more here, because it’s the topic of this discussion.

Trays.

I cannot say much about this topic just yet, because I’ve only used trays for one application, so far. It’s not to say I cannot discuss my experience with using them, because I will.
I’ve used trays for easier hydration for my plants, but just know I use this method for a handful of plant varieties, not just carnivorous plants.

I know that the humidity tray method is often used, especially when the humidity is somewhat low around the plants. This involves trays filled with water and little rocks, pebbles, or gravel. Some are quite similar to aquarium pebbles or gravel; but it’s not to say that they cannot be used in place of these little rocks, pebbles, or gravel, because that’s what I’m using currently.

Trays can be used for a multitude of uses. Some are used for propagation, and some are used for long periods of hydration so that it’s not needed to constantly or frequently watering the plants.

In using these trays for watering plants, they obviously water from the bottom, which means that the top won’t be included in this process. This means, that it will require a top watering, or a spraying, to get the tops of the plants watered, which is fine, because whatever doesn’t touch the plants, will end up in the trays instead.

Some trays are meant for more than just holding water. Some may be used for other purposes, such as propagation, seeding, and just for keeping plants organized in a neat setup.

This is what you see with trays where people are seeding, and use them to space out their seeds for them to grow without being clustered and the roots potentially wrapping around other roots of other seeds beginning to root in that area. If it’s one or two, it’s not that big of a deal, but if it’s maybe five or more, then it can be an issue, if they are growing into separate plants. Which is why this can be a good solution to prevent that.

Some trays can be used for propagations, and growing moss. When looking at the process of growing microgreens, it’s not much different on the surface as growing live moss. (There may be more to this, so when I do find out, I’ll discuss it later.) Just have them in water, and have the tray covered. The tray can be one that has some partition between the outer tray and the plants intended for growth, where the water will go to the bottom of the tray, and hydrate and nourish the plants from the bottom. The top will be receiving any air and while covered, it will get the water evaporating and rising to the lid, and comes down on the tops of the plants. This way everything gets hydrated, but also humidity to accelerate that growth, which you see happen with plants in terrariums. For those that have holes in the lids, that’s for some of the air to escape, and eventually some of that moisture will also escape. Now, this will result in needing to refill the trays more often, but it’s good for preventing algae growth.

This isn’t a topic that I know much about. I’m still learning about topics like microgreens, and even growing live moss. The latter, I’ve tried, and it’s still in progress.

There are various uses for trays, besides organizing. When it comes to plants, you know of some, and other creative ways to make things better. Over time, I’ll find out more, to show you what I find.

Soil/Media.

Often, it’s decided when growing plants, which type of medium to grow them in. I bring this up, because it’s not always the case that you should use soil or soil varieties to grow plants. It’s true that plants can grow in a variety of settings, including without any type of media.

I can attest to using a variety of soils, and other mediums to grow plants. I can also attest to the ones I haven’t used yet, but may in the future. I’ll discuss this in better detail.

For most of my plants, the standard regular plants, they often are planted in peat moss, often referred to as sphagnum peat moss. It is made from sphagnum moss, but I can’t explain the procedure other than allowing it to decompose, and it’s basically reused as soil, which is what I’m using for most of my plants. It seems to be quite similar to regular soil you would have trees and plants growing outdoors, which is why many are good in this medium.

I have had some failures due to external factors, some of which may involve premature or constant transferring of plants from one setting to the next, but other than that, they have worked well in peat moss.

For other plants, you have a mix of mediums, and we do know of others, that aren’t often used by themselves. There are reasons for that. It’s not to say that it can’t happen, because there are some people that can prove that certain mediums can be used separately. Perlite, often is mixed, because of its light texture. It’s as light as Styrofoam, but is often mixed with heavier mediums like peat moss and sphagnum moss. You may have to experiment with perlite, but just know how light it is.

It’s not good breathing this stuff in, so be careful, and should you decide to use perlite, get masked up, for using this even for light and short term uses.

Perlite is known for aiding in proper drainage, to most plants, when especially mixed with other mediums like peat moss.

Various mixes of mediums, can have bits and pieces of lava rock, and when using rocks like lava rock, in much bigger sizes, they can be used for providing a spot for plants to have roots grip and grow onto them. The bigger pieces are used more for decorative purposes, but it’s ability to have plants attach themselves to these rocks, are beneficial to an extent. This is best to have them in terrariums because of the moisture and humidity inside. With the pieces, which are often as small as pebbles and gravel, to dust, these mixed with other mediums provide the ability to have better drainage, compared to those other mediums alone.

Let’s look at sphagnum moss, and how it’s often used. In this journal, I’m referring to the dried tan colored variety sold in many different stores, often long fibered. You will see them in pet stores as well, either in tan or green. This is most commonly used for lots of tropical and carnivorous plants. Many recommend using this because of its ability to hold water, and keep the plants hydrated for longer periods, compared to other types of media. It’s not good for all types of plants, and you may have to ask an expert, and do your own research of how not to use sphagnum moss, in this manner.

I did discuss rocks, lava rocks previously, but when it comes to a planting medium, small rocks can provide a good way to keep plants stable, if they have difficulty to stand on their own, after growing tall. Notice with other mediums, you may see these plants droop because the leaves are heavy, but the stems are light. In many instances, you have to add some rocks to keep them upright, or have them lean against something like a bamboo skewer, or if it’s sharing space with other more sturdy plants, use them to balance the plant until they grow strong enough to be on their own.

For the former, having them surrounded by rocks, will help, and it can also help with having less water, to prevent over watering. I currently have two “lucky bamboo” plants in individual containers, with rocks and water only. The roots are fine, they aren’t so much that the roots are all over the place, but, it’s doing well enough for the bamboo plants to grow leaves. Maybe over time, if the conditions are good enough, I might see some flowers.

Fingers crossed!

Special mixes, often are sold for a certain price, depending on where you choose to go. Personally, I recommend for the better price, some hardware stores, compared to plant stores, may sell them for a lesser price. Some may go as much as half the cost. This is just from shopping around. You may get a good set for example, for around $7, where in some plant stores, and even other hardware stores, you might pay near double that, or three or four dollars more.

With that said, make your choices wisely. I use a tropical mix, for my terrarium plants in, “the tank”. I use a good enough set, where the plants and their roots can spread enough to be satisfied with the settings. That mix, has the lava rock pieces that I mentioned previously, throughout the entire mix. I use this mix with other plants, but I try to keep this mix away from my carnivorous plants.

For the carnivorous plants, I may alternate from time to time, between sphagnum moss only, peat moss only, or a mix of peat moss and perlite. I do know that many carnivorous plants sold, will often be on displayed for sale, and are often covering the roots with soil, usually peat moss wrapped and covered with a light paper covering, and the rest being sphagnum moss. Growing them at home, it’s actually the reverse, but without the light paper covering. This can result in the plant getting more water and moisture. This is one of the methods I used previously, when keeping most of these carnivorous plants, VFTs especially, in smaller terrariums.

Air plants of course, are plants that need water, but no mediums, because they have no roots. I don’t know of other plants, that don’t need plant mediums of any kind; not yet anyway.

To add to this, you can grow some plants with simply immersing them in water. I’ve seen this done, and for some it works just fine. My mother had a very viney plant that grew in a big bowl of water, and it kept growing until the water evaporated, and eventually the plant died, due to our absence from the residence. Otherwise, no type of medium was needed for stability of any kind. In fact, water is often a good source for propagating leaf cuttings, which is also why this is good all on its own for maintaining most (if not all) plants.

Just like with rocks, you do have options such as leca, which can be used similarly to how I used the pepples and gravel for my “lucky bamboo” plants. They are generally lighter, because they are clay pebbles, which may not work for all types, but for the ones that do, the success rate may be quite high. I haven’t used this just yet, but I hear them recommended regularly, from plant vendors and online recommendations. At some point, I may check this option out, and then I’ll follow-up.

You have also coco peat, which I haven’t pursued yet, but if I do get some, I’ll use it and document my findings.

There’s also sand. Many say that it’s not a good medium, or substrate to grow plants. Yet, it’s good to mix with peat moss and other types of media, for better drainage. There are a variety of sources that show plants successfully growing in sand. Wait! How can they say that’s not possible, when we tend to see some plants growing at the beach? One day, I will try that for myself, just to see it be possible, with my own eyes.

There are much more, and I could not add anymore to this list. Over time, that will change.

Flowering.

This isn’t a simple topic for me to discuss, because it doesn’t always come around for all plants; or at least not for all or even most of the plants that I have or had, that I have owned to some extent.

For the most part, with natural sunlight, and clean water (obviously), plants can eventually grow long enough and eventually, they can grow and produce flowers. Given the right media for the plants to grow in, along with the water and sunlight, this can happen, naturally, over time. It’s often different for most plants, and depending on weather conditions, you will see this happen eventually. However, if they are indoors, then it may take longer.
Of course, with the advent of using grow lights, of all varieties, you can advance this result much sooner, and not simply during the standard blooming seasons. For most plants, that is usually spring and summer.

For some of the plants that I have, they don’t flower at all. This doesn’t mean that your plants’ growth isn’t a success; that success can be something other than flowering. It can be large growth, and enough growth to show that the plants are happy and content to keep on growing. That’s fine. If you have a plant that you get in a small pot, that eventually is repotted, and grows to maybe close to five or to ten times its original size, and is also healthy, I think it’s safe to say, it’s a success.

For other plants, this can happen, and flowers can also appear and bloom. Many flowers that bloom, won’t stay around for very long. They are very nice to look at, and often in the best or most ideal of conditions, the flowers may last for a few days to a week; maybe longer depending on the plant. If it continues to bloom, almost non-stop blooming for some plant varieties, once a flower goes the distance, and eventually withers and/or falls off of the plant, it often is replaced with another flower, nearest or in the same point.

I’ve seen this personally with a few plants. One of them was a plant I had for the spring and summer of 2023, the kawaii soiree catharanthus, the white peppermint variety. This plant I bought randomly, and it was already flowering. After I repotted it, it didn’t bloom that much, but after enough time passed, some days it would bloom to see flowers increase. I bought the plant with maybe three or four flowers. I’ve seen it consistently blooming to replace flowers at a near record pace. At some points, it would bloom as many as seven, eight, or nine flowers at once. I’ll admit, the environment wasn’t ideal, but it was okay, but because of the grow lights, that was enough to make this happen.

I did mention earlier, that grow lights can influence flowering in plants, and for some, settings may or may not matter. For the white peppermint, this was made apparent, with the grow light bulb setup, in a window that wasn’t facing direct sunlight.

I had something similar to some extent, with another plant, which I salvaged off of another plant, and eventually it grew larger, and large enough to push flowers now. It’s been doing this, since I placed it in, “the tank”. The humidity, and the grow lights, helped speed up this result. I’ve seen this happen, after a few months, and it’s happening even more recently. It’s not just the fact that it’s flowering, but it’s also growing tall, to the point where it’s touching the top of the fish tank.

Of course, with sundews I’ve had in the past, and currently, the spoon-leaved variety, referenced as drosera spatulata, flower stalks will appear during its blooming season, which is often summertime. Getting direct sunlight will induce this, no matter where they are set to grow.

To add to this, I’ve had other spoon-leaved sundews, but under grow lights. I’ve had them well beyond their blooming season, but because they are under grow lights, certain settings under these lights, will induce flowering. For these plants, they will produce flower stalks prior to seeing actual flowers.

The one thing we know about most (if not all) carnivorous plants, flowers are produced away from the plants, so that they are well above the plant leaves, that capture their prey. This is true for sundews, and VFTs. Yes, even pitcher plants, nepenthes and sarracenias, may do this, although I haven’t yet seen this personally, but there’s still time.

Unfortunately, for carnivorous plants, there needs to be something sacrificed, when they produce flowers, or severely compromised. Most of its energy is often focused on traps, or creating dew or fluid to capture and digest their prey. Once the flower stalk comes, then most of the energy is transferred to growing the stalks, and then the flower after it blooms. This slows down everything else, and it doesn’t always lead to the plant’s demise, but it will take longer for the main priorities to focus on capturing and consuming prey, because of the energy distribution.

This can be remedied, by allowing the flower stalk to grow maybe an inch or more, then cutting the stalk closest to the base of the plant, then you can either propagate it, or dispose of it. Successful propagation of this, I haven’t had this occur just yet; but when I do, I’ll discuss it in another journal. After cutting the flower stalk, the main priorities of the carnivorous plants can be focused on again, where the energy isn’t spent on growing flowers anymore.

Other plants that have flowered quite well, are my coleus plants, where this took quite some time, because I didn’t have them under grow lights of any kind. It was direct sunlight only. This plant, which started out as two small plants. Now, as a result of propagations to produce many more additions, and repotting, eventually, this resulted in massive growth, and eventually, some flowers. These are my indoor window plants.

Understand, that most plants that can flower, will flower. Not all plant species can flower, but for the ones that do, it’s somewhat satisfying. Not all of the plants that flower will produced the best looking flowers. However, the job of those flowers, are often to attract insects that will aid in pollenating them. Just know that if you have an open window, and you all of a sudden have a problem with flies, bees, or even butterflies in your home, this is often why that is. If you have carnivorous plants, that problem can be solved, when those same bugs, end up becoming their meal; but I digress.

It’s safe to say that when you do see these plants flower, it can be satisfying to see them, but it can also show your success in growing them, to get them to this point, both naturally, and artificially.

Lighting.

When it comes to plants, they need the essentials, like water, and sunlight. In many cases, you can substitute sunlight with artificial lighting, to aid in plant growth.

You would be surprised of the types of artificial lighting you can choose from, to maintain, and to sustain plant growth. Many know of the handful of grow lights they have in the form of LED lighting, in a few different colors, often white, red, and blue. You have others that may just be white, with something else, that isn’t visible, nor optional to change. Some of them are quite simple, and I’ll get to all of those in a bit.

First light that I want to discuss are the lights often used before grow lights became available to most everyday users. They were called grow lights also, but they were of the bulb variety, not LED based. They were similar to the fluorescent lights we were forced to transition to in the early 21st century. I was first introduced to these types of lighting through AeroGarden, and this was something my mother had to grow some herbs and small vegetables. The lamp was multi-functional and the bulb was a part of this setup. It was good, because it had a built-in timer, that keeps the plants fully immersed in this artificial light, for around 12 hours. I used this for many plants to grow, but when they literally started reaching the lights, I had to move them. For the smaller ones, that didn’t have this issue, this stayed with them, until they couldn’t be maintained any longer.
They still have fluorescent grow light bulbs made available, but the likelihood of finding a good setup, with a timer may be the biggest challenge. Since then, the grow lights have been in a variety of differing types, not just the LEDs, but other types of bulbs. I have been using only a subset of grow lights, and most have been the LED types, that are promoted more times than not.

Let’s look at the smaller grow lights, the strips that only have one setting. Some of these, tend to be adaptable to USB outlets, to save energy off the bat. Some of these are quite inexpensive, some running around less than $10 on average. Many you can get at Amazon, and I’ve received a good set. There are some you can get from hardware stores, like Home Depot, and True Value. They will carry a variety, but the cost may be much more than you would expect. It is an investment, so be aware, you can start off cheap, but just know, sometimes the cheap ones can work nicely and for the long term, but it’s not a guarantee. When it’s time to upgrade, you can get some that can run as high as $200 and higher, while some can be around $50 or $60 each.

For the ones I received from Amazon, I received a few that worked out quite nicely. The first one was a three-head lamp with a clip rather than a stand. Actually, I ordered two of them, primarily to clip on or near the edge of the window sill. Each have timers, but they also had the USB connections with adapters. The adapters often will wear down, because unlike what most adapters are used for, they are short-term. That can be a problem, because long term use can make them overheat, and I’ve had one that just could no longer be used. It was burned out, in other words. That’s one thing you need to be aware of, when you get these types of LED lights, especially if they are semi-heavy duty. These cost me, somewhere near $20 total. These had timers, and intensity settings. It could also alternate from using either one, two, or all three heads at the same time. It’s flexible, both in the physical sense, and in other ways also. The issue for me, I detailed previously with the potential to overwhelm the adapters, where they can and will overheat, and potentially shut down. At times I’ve had this happen with one of them, and had to put the other on pause, and have it on standby, just in case. These I often used with, “the tank”.

The others I got from Amazon, and these were around $6.50 each, and I got three of them. These were single setting grow lights, where you plug them into an adapter, since they are USB compatible. They have an on/off switch, and that’s it. It’s bright enough to do the necessary, to give plants some needed light, where they often won’t get it, in certain areas.
These also have plant stakes that are removable, and there are ways that it can be used to be as an overhead setting. Here’s what I did:

When I got the option to get a curtain rod, because these are slim and light enough, I hung these, along with others much bigger, to get this advantage. I tied most of them with paracords, with certain types of knots, while also, using wire bag ties. This gives enough light exposure, where some plants, mostly small and single plants, will get what they need.
I’ve done similar with other grow lights, for the plants that cannot be near a window that exposes the plants to full and direct sunlight. The stronger, and better grow lights, I purchased for near $40 and $45 each.

The first one, which was about $40, costing about $38 and change, I hung from a curtain rod, and it covers most plants. It has a programmable remote control, where you can set it to several settings. Most settings are for seeding, vegetation growth, and flowering. It’s a full-spectrum LED lamp, and as far as I know, it’s not the type that shuts off automatically. That’s a manual on/off variety.

I’ve had many plants grow and even produce flowers, and this is added to the proper watering.

The one that was $45, nearing $50 with tax, I recently got, didn’t have a remote, but it had manual switches, to change the settings of the lighting. Each switch, was for each colored light. One for white, one for red, and one for blue. The types of combinations can be set from each light, either one, two, or all three, can be set, and also, the light has that manual on/off switch.

This one also resulted in most of my plants growing more, and producing flowers, or at least beginning growing flower stalks. Most of them being sundews of course.

For most of my carnivorous plants, that can deal with moderate humidity, these work quite well. So far, my VFTs, sundews, and sarrecenias, have done quite well, despite some light stress issues for some (the sarracenias especially) that lead to the leaves turning red. Some plants, the cape sundews especially, will develop dew much faster under these lights, and some like the spoon-leaved sundews will change from green to red. Not all will, some are temperamental like that, but most (if not all), will eventually develop dew quicker.
Now, the grow lights, are good to aid in giving light to plants, on dull days, or days with short sun exposure, and that’s an option I use for a few plants right now. They get both, but mostly how I have it now, the lights are on for much longer. The one with the manual individual light settings, I’ll keep on for a while, rarely shutting it off.

Most of these I will keep on for some time, not always 24 hours a day, but keep in mind, for most grow lights, they are low power, and you may not see a big hike in your electric bill. If you have a lot of them, and most of them do not run higher than 27 watts, so it will still be beneficial if you want to conserve energy. However, if you have a lot of them, it can still add up, and give you that unwelcome surprise in you electric bill, so be aware of that.

For some that have the option to use USB adapters, you can opt for using USB power banks to power these grow lights. However, they do drain these power banks quite fast. If they aren’t adjustable, they will drain faster than you would imagine. Some may only last about 30 minutes, others may last an hour or two, at best. If the grow light has programmable options, like changing the intensity, you may have the grow lights last for several hours to a day or even two. That’s likely to happen when the intensity is at its lowest. You may have to be present for these, because you won’t know when the power bank runs out of power, and the grow lights will power down, when you aren’t around.

There is an interesting hack that may work for some power banks, where you can charge the power bank, and power items at the same time. I’ve done this with a few grow lights in the beginning. I can still do that, for the USB types, but often you have to be present just to see what happens. Depending on the power banks you get, they may continue to work well, whereas others may not and could wear down, and not be seen as useful for this result.
Also, not all power banks work well with grow lights, and some will shut down after a few minutes, or worse, you’ll see and experience the fluctuation in the lighting emitted from the grow lights, and it will be tough for you to get used to it. This is why I say it’s an option, and not a preferred choice.

For the grow lights, it’s a matter of preference, but also convenience and usefulness. So you can do your own research, and do some trial-and-error to see what works for you.

Other Types.

There are a variety of plants that I have chosen to have in my home. I look at a few plants, that eventually just don’t make it. There may be reasons, that put them in the category of fickle, while other simply just don’t survive for very long. Now, you could put this under fickle plants, because there are some that are quite fickle with their environment, even when they eventually reach the point of flowering.

However, when it comes to fickle plants, most of us have been there. No matter how we care for them, try to keep them alive, some simply either can’t or won’t stay alive.

In many instances, it’s out of our control. However, if we can control the circumstances around us, it will take a lot of effort for little positive outcomes. In the end, the plant will still end up perishing. That happens, and it can happen with certain plants. Your environment often results in some plants either struggling and then dying, or being just fine, and can live for quite some time. For the ones that had the former result, I will discuss here.

Much of the environments can lead to good results as well as bad results. An example of this can lead to a plant thriving at first, but later on, you start to not see something happen, such as overall growth. If you have a set of plants that grow, but there’s one that doesn’t, you have to figure out why.

One for me was an air plant. For some it’s quite easy to maintain, but it’s not always the case, especially if you live in an area, or an apartment for example, that’s extremely dry. The air is so dry, that it can give certain people nosebleeds. That needs to be fixed with either a humidifier, and evaporative air cooler, or something that can lead to the air being of normal/moderate humidity, or slightly humid for the plants.

I’ve mentioned the notion of this air plant that I had, was fickle, and that requires explanation. The air plant that I bought is no different than any other, but I was given some advice, in regards to humidity making them grow quite fast, or at best showing to be greener and happier when it’s in a humid area. Every so often, air plants will need to be dried out, naturally. I made that mistake, in doing this a bit too late; so this may have been a mistake on my end. However, what I did realize when I didn’t see it grow, some cases, it’s recommended to pull off some of the outer leaves. When I did this, I saw some browning of where it should be rooted. By the way, air plants don’t have roots. Those leaves were coming off a bit too quickly, and this continued until there wasn’t anything left.

To a degree, it may not have been a fickle plant, but for me it was. I had it in, “the tank”, usually hidden under the fast growing plants around it. However, when I raised it to be closer to the midst of the environment, atop of some of the parlor plants, to get more light, this resulted in drying it out quite fast, becoming its default grey color, once again. It was in a very high humidity environment, where, “the tank” has an average humidity around 85%. It may have become temperamental because of being in that environment, but as stated earlier, it may have had a bit of rotting in the bottom of the plant, behind the outer layer of leaves. This may have been the sign that I could not see, that the plant may have been dying, and I couldn’t see that, until it was too late.

I’ve had my issues with succulents, and I had an issue with one type, where I did things right, and even tried to not water them too much. Keeping them in a dry air environment wasn’t an issue, but apparently it was, because they eventually died. Leaving an overwatered succulent to dry out, should be easy, but in some instances, it wasn’t the case for me. I didn’t have the succulents, and yes, I had maybe two or three, and all in open air environments, and no matter what I did, all of them died. I watered when needed, less frequently than the other plants. Just like with cacti, they can’t be watered too often; they need to be watered maybe weekly, bi-weekly or monthly. If the environment is dry, then maybe bi-weekly just to counter the dryness; which is better for most plants that prefer moderate to higher humidity.

For me, succulents don’t work. I can deal with cacti, but as long as I get the ones that don’t have fake flowers hot glued on them, it will be worthwhile, but for me, succulents are a no-go at this time. I can’t include those type of cacti, because they were manipulated, and damaged, and it’s not an issue of them being fickle, in my opinion.

When it comes to fickle plants, I can say with clear certainty, lavender plants are in this category, because no matter what I did, repotting, giving them good lighting and water, It still resulted in both plants dying. I bought two, and both of them dried up significantly. The problem here, was no matter what I did, nothing would work.

Lavender plants are no good in tropical environments, at least the ones I bought didn’t like high humidity. I tried propagating them, with a humidity dome and in soil, and it resulted in the plant developing mold, instead of rooting. I tried this without the dome, and just in water, and that didn’t work either. Many have tried these methods, and for them, they worked. For me, nothing worked. It was more stressful just trying to maintain them, and to keep them alive. After a while, I just gave up, because it wasn’t the water, and it wasn’t the lighting, and it couldn’t have been shock either. This plant simply didn’t want to be in the environment it was in.

I can also add the string of pearls, and although it is a good plant to have, where I live, it’s very fickle, and only lasted maybe a few months at best, before it finally shriveled up and died. It’s one of those semi-succulent types of plants, where they don’t really care for humidity, but require water and sunlight regularly. (Some say otherwise, but either way, I got the results that came with it.) Again, the issue may also have been the environment, because of its excessive dryness in the air around it. You can’t over water them, and you can’t keep them in bright sunlight either. You also can’t under water them, or keep them too dimly lit. Other people may have the opposite experience, and some of that maybe because of where they’ve chosen to keep these plants, but for me, it just didn’t work out, and now that plant is a distant memory. Yes, I did try propagating them, several times, but to no avail. Oh well.

I can say that I took a chance and bought a random set of plants from a plant vendor at Union Square, where they often have the Farmer’s Market. One of them I looked at was a plant that was already flowering, and it kept this up for a while. This was called a Kawaii Soiree, or Kawaii Catharanthus, and it’s also called, “white peppermint”. I can’t say much about this. Right now it’s pretty much gone, just like the lavender. Only difference, it wasn’t truly that fickle, because it spent the entire summer just flowering, and it was only once the weather got a bit colder, it chose to change, and not for the better. It gave me no trouble, until maybe late September, and after that, it was nothing I could do. I want to say that it went dormant, but I’m sure that’s not what happened.

For some plants, you can be doing everything right, including adjusting the humidity in your home, and it will still not work for some plants for whatever reason. I will admit, there may have been things and assumptions on my end, this is especially the case with the air plant. For the others, they simply didn’t want to be there, or they simply couldn’t adjust. You know it looks bad, when you have them in different settings, and no matter what you do, they both end up dying anyway. That proves why some plants simply aren’t compatible with some areas, no matter what you do to accommodate them.

Could some of them die, because of an infestation that you cannot see? It’s been said to be the case for a few plant enthusiasts. I’ll have to look into this personally.