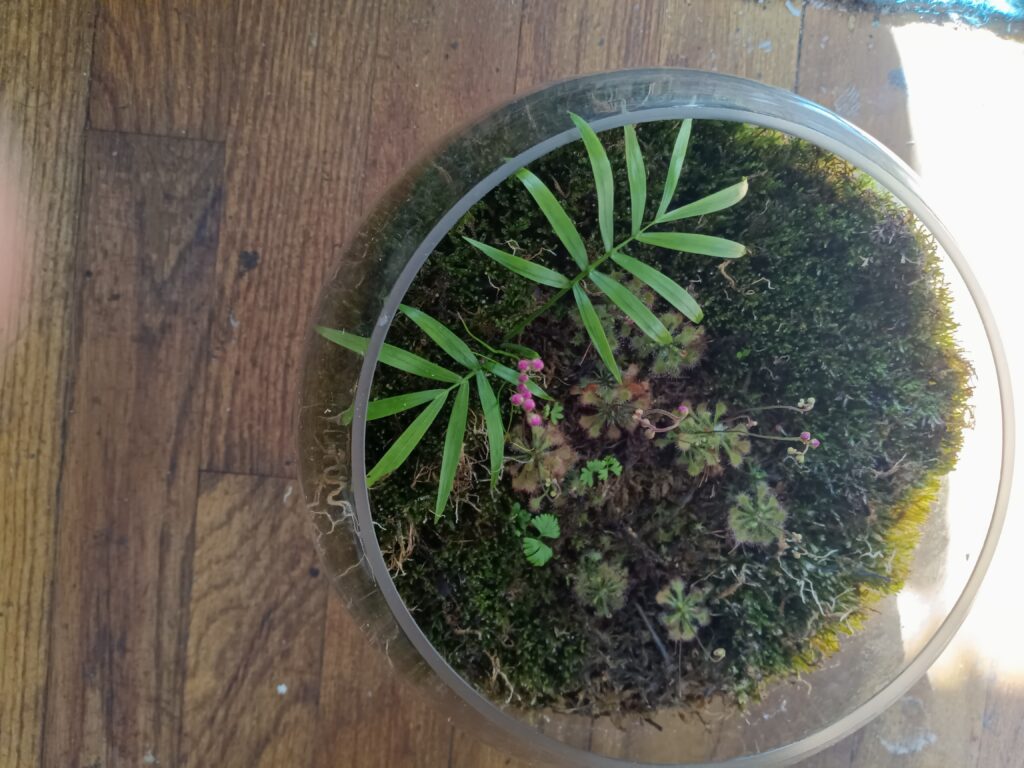
Maintenance: “The Tank”.

Every now and again, plants need to be trimmed, pruned, and cut, for the sake of the health of the plant. This is no different for the plants within what I refer to as, “The Tank”. This is especially true for any instances of neglect, major or minor, as well as general care for the plants in there.

There are quite a few varieties of plants that I have in there, it’s often difficult to just cut what’s in there. When you have plants that have the tendency to grow continuously like a vine, you already know that those need to be trimmed.

I wasn’t feeling well, and when I was sitting out a month ago, I had some time to look at what I could not address right away. For one, during this time, my grow light wasn’t working properly, so I turned it off. As a result, because the plants didn’t get proper lighting, the leaves became a pale green, which isn’t a surprise. However, they continued to grow, because they still had their humidity. That eventually began to dry up, because of the continuous growth of the plants. Also, the plants weren’t getting enough light, and some of them trapped underneath one another, some leaves were withering away. Other plants and their leaves continued to grow without a problem.

The end result of it all became a decision of where to start trimming, and cutting. Most of the vines were of course the first priority to cut and trim. They were all over the place. Normally, letting these plants grow isn’t a problem, but because of a month’s hiatus, I had to go back to assess the situation. The issue comes with seeing just how much humidity was left in the tank. Surprisingly, there was still enough in there for the plants to thrive, prior to trimming and cutting.

While trimming and cutting, I of course reset the grow light to stay on 24/7, not because this is the plan, but because the light is damaged and needs replacing. It’s better for me to leave it on like this, and not to just leave off the light altogether. This way, the plants won’t be as pale as they are currently.

When I was finally able to see soil in enough areas within, “The Tank”, then I rehydrated the soil a bit more. I grabbed my pump sprayer to mist the area quite well. Then I replaced the lid on, “The Tank”, to keep the humidity inside and consistent.

My biggest challenge was to keep from trimming or cutting the wrong plants. It still happened, but not in such high frequency. There are some plants that are still quite tall, and are beginning to widen quite a bit. I have to make a decision of what’s going to happen next. I can trim and propagate, but that will mean removal of other plants that are especially growing tall, where I don’t want to remove nor replace. So, this will take some time to think about.

Until then, I’ll keep watch of the progress of re-growing some of these plants, and deciding potential locations to place some other plants. As long as they can be reacclimated properly, it will be a good result going forward.

More On Grow Lights.

When using grow lights or even regular lights, we know that they can use up a lot of electricity. Grow lights do need to stay on for extended periods, at least 8 hours, and for some, at most 14 or so hours.

There are some grow lights that have their own timers. This isn’t the case for all of them.
For the ones that do have internal timers, you have the option of setting those timers to turn on and off for a several durations. Some have as few as 3 to 4 hours, some have 6 to 8 hours, others have 9 to 12 hours. It varies from manufacturer to manufacturer.

For the ones that don’t, you have only one option, to manually turn on and turn off the grow lights. This is where you’ll need external timers to plug them into.

For those grow lights that have USB plugins, as long as you have a USB adapter to plug into an outlet, you may be just fine. Just plug them into the plugin timer, and you should be on your way.

For plugin timers, you have the option of setting the on times and the off times, so that it can turn on and off automatically. You plug the lights into them, then plug the timers into the wall and it should work just fine.

For example, you set your timer for one light, to turn on at 7 am, and to turn off at 7:30 pm; you set your timer for another light, to turn on at 9:30 am, and to turn off at 9:45 pm. See how that works?

For the grow lights that already have timers, they are set for specific 3, 6, or 12 hour intervals (I’m discussing the ones that I have), but it does experience wear and tear, with the timer occasionally resetting, without you realizing when it happens. In some instances, you’ll need to give that grow light a break, or replace it altogether.

When it comes to the separate external timers, they can run as little as $10, to as high as $30 or more, each. It’s a good investment, especially if you want to conserve energy.

The advantages of having timers, I’ve already discussed. The disadvantages, is that you need one timer for each grow light. This means one timer for each light, and setting each light to turn on and off individually. That’s more time consuming than anything, but in the end, it’s worth it.

You’ll know this when you look at the difference in your electric bill between the previous month prior to buying these timers, and the month after you buy these timers. These will be most beneficial, in the colder months, when sunlight isn’t as prevalent, compared to the spring and summer months.

So far, I only have three separate timers, but I do need a few more, because I have at least three more lights that need timers. Guess what I’ll be doing in the near future? Yes, getting more plugin timers.

Fertilizer.

At this time, I don’t use fertilizers in my plants. Well, to be fair, this isn’t the case with some of my carnivorous plants. This is only the case, if I’m feeding them. Here’s what I know. When carnivorous plants are either feeding themselves by catching prey, or being fed by hand, those plants will use what they consume, to get the nutrients they need, to advance their growth. The truth is, they don’t really need to feed or to be fed, but they do need sunlight and water, at the very least.

There are a variety of ways we help plants grow with fertilizers, and they can work like a booster, nearing the equivalent of how steroids or growth hormones work in mammals per se.

You have plenty of fertilizers to choose from, however, the pros and cons may result in influencing whether or not you want to invest in fertilizers.

Now, for some people, hydrogen peroxide or H2O2 is often used, when diluted of course, as a type of fertilizer for plants. When I say that, understand that when you hear fertilizers, for plants, they are boosters for plants, as explained previously. Now, how does hydrogen peroxide work as a fertilizer for your plants? It works this way, to boost the oxygen intake in your plants’ roots, and their leaves. The issue with using it, is that you do need to dilute it with water. THIS IS A MUST!

You also have to make certain that you dilute it enough so that it doesn’t burn and damage the roots and the leaves. This can happen if you don’t dilute hydrogen peroxide with enough water. This may vary, but on the safe side, you water to H2O2 ratio should be around 3 to 1 or 5 to 1. The high ratio should be towards the roots, and the lower ratio should be for spraying the leaves.

Too high a concentration, can lead to burning of the roots and the leaves, and this isn’t just this way with H2O2, but this can happen with all types of fertilizers. By the way, H2O2 is easy to find in most (if not all) pharmacies. You can say this might be a hack, if you are looking for a safe enough way to fertilize your plants. DO YOUR RESEARCH FIRST!

You have many types of fertilizers, but you have to know what’s best for smaller plants and bigger plants. Many are powdered, some are already in liquid form, and others are in solid chunks or sticks. Brands like Miracle Gro, are known for making all types of fertilizers. Best way to begin, is to start off as small as possible. Look at the instructions first, because even your efforts to not use too much, may still be too much.

Now, we do know that grow lights can work to advancing the growth in plants, without adding anything other than special lighting to manipulate the plants’ growth and the speed of that growth. I wouldn’t advise using fertilizers of any kind, if you are using grow lights; just my opinion. I only suggest against it, because it could stress out the plants, more than they already are.

Without going into details, using fertilizers, isn’t really my thing, because of using grow lights, and seeing the success in growing my plants so far. For my carnivorous plants, regardless of feedings, they are doing well. So me personally, I don’t need fertilizers at this time.

Dormancy.

It can be confusing to those that haven’t seen this, and even worse for those that don’t understand what dormancy is. It’s similar to what we know as hibernation, but for plants.
We know this about certain plants, when the colder months arrive, or when they experience that cold snap, and slow down on their growth. This can also result from less sunlight, which occurs during those months.

Most of the time, when looking at certain trees, bushes, and plants, we do know that some will lose their leaves, and there are some that won’t. In many instances, for the ones that don’t, may be seen as the types that don’t go dormant. It doesn’t mean that’s the case, across the board.

As far as house plants, I do have a variety of plants that go through a dormancy period. Much of why this is, often comes with the weather changes, and for some, environmental changes.

A good variety of carnivorous plants go through dormancy periods, but when you purchase them, depending on the vendor or outlet, will be indicated whether or not they should or will go through some kind of dormancy. Other plants will go through dormancy, but it’s not often indicated, nor discussed whether it happens. It may be recommended, depending on how or if you bring it up.

For the most part, if you know the types of plant you have, such as a tropical plant, it should more than likely go into a dormancy period, if it’s in a cold weather environment. It’s even more the case, when there isn’t any natural light sources nearby, to create the photosynthesis known for plants to thrive.

Is there a way to counter dormancy in plants? Yes, and all these steps need to be done to be successful in countering dormancy.

First, get some grow lights. Artificial lighting such as these grow lights, will bring the light sources needed for plants to create that photosynthesis, and it does help on days with less sunlight. It will also help if you have plants that may be near a window or an area that doesn’t get direct or even indirect sunlight.

Second, keep the plant in a warmer area. If you notice the plant is slowing down in some way, check to see if it’s cold in that spot. If it’s near a window, and cold breezes become more frequent, shut the window, or move the plant somewhere else, where it’s warmer. Oh, by the way, make certain that the area you place the plant, isn’t too close to a heat source, like a radiator, so that it doesn’t cook your plant, and dry it out.

Third, keep watering the plant as you normally would. Keep things routine, and you can see continued growth.

Can this work for all plants? No, but there are some that are successful in a process similar to what I just described. Some plants actually need dormancy, so do your research on which ones are said to require dormancy.

As long as the plants feel any indication of cold weather coming on, and less light, they will slow down. They won’t die, but they will appear to be dying. They are not, they are just going into dormancy. As long as you have the tools and information to understand why it happens, and how it can be avoided if this is the path you choose, then you shouldn’t have a problem.

Flowering.

This isn’t a simple topic for me to discuss, because it doesn’t always come around for all plants; or at least not for all or even most of the plants that I have or had, that I have owned to some extent.

For the most part, with natural sunlight, and clean water (obviously), plants can eventually grow long enough and eventually, they can grow and produce flowers. Given the right media for the plants to grow in, along with the water and sunlight, this can happen, naturally, over time. It’s often different for most plants, and depending on weather conditions, you will see this happen eventually. However, if they are indoors, then it may take longer.
Of course, with the advent of using grow lights, of all varieties, you can advance this result much sooner, and not simply during the standard blooming seasons. For most plants, that is usually spring and summer.

For some of the plants that I have, they don’t flower at all. This doesn’t mean that your plants’ growth isn’t a success; that success can be something other than flowering. It can be large growth, and enough growth to show that the plants are happy and content to keep on growing. That’s fine. If you have a plant that you get in a small pot, that eventually is repotted, and grows to maybe close to five or to ten times its original size, and is also healthy, I think it’s safe to say, it’s a success.

For other plants, this can happen, and flowers can also appear and bloom. Many flowers that bloom, won’t stay around for very long. They are very nice to look at, and often in the best or most ideal of conditions, the flowers may last for a few days to a week; maybe longer depending on the plant. If it continues to bloom, almost non-stop blooming for some plant varieties, once a flower goes the distance, and eventually withers and/or falls off of the plant, it often is replaced with another flower, nearest or in the same point.

I’ve seen this personally with a few plants. One of them was a plant I had for the spring and summer of 2023, the kawaii soiree catharanthus, the white peppermint variety. This plant I bought randomly, and it was already flowering. After I repotted it, it didn’t bloom that much, but after enough time passed, some days it would bloom to see flowers increase. I bought the plant with maybe three or four flowers. I’ve seen it consistently blooming to replace flowers at a near record pace. At some points, it would bloom as many as seven, eight, or nine flowers at once. I’ll admit, the environment wasn’t ideal, but it was okay, but because of the grow lights, that was enough to make this happen.

I did mention earlier, that grow lights can influence flowering in plants, and for some, settings may or may not matter. For the white peppermint, this was made apparent, with the grow light bulb setup, in a window that wasn’t facing direct sunlight.

I had something similar to some extent, with another plant, which I salvaged off of another plant, and eventually it grew larger, and large enough to push flowers now. It’s been doing this, since I placed it in, “the tank”. The humidity, and the grow lights, helped speed up this result. I’ve seen this happen, after a few months, and it’s happening even more recently. It’s not just the fact that it’s flowering, but it’s also growing tall, to the point where it’s touching the top of the fish tank.

Of course, with sundews I’ve had in the past, and currently, the spoon-leaved variety, referenced as drosera spatulata, flower stalks will appear during its blooming season, which is often summertime. Getting direct sunlight will induce this, no matter where they are set to grow.

To add to this, I’ve had other spoon-leaved sundews, but under grow lights. I’ve had them well beyond their blooming season, but because they are under grow lights, certain settings under these lights, will induce flowering. For these plants, they will produce flower stalks prior to seeing actual flowers.

The one thing we know about most (if not all) carnivorous plants, flowers are produced away from the plants, so that they are well above the plant leaves, that capture their prey. This is true for sundews, and VFTs. Yes, even pitcher plants, nepenthes and sarracenias, may do this, although I haven’t yet seen this personally, but there’s still time.

Unfortunately, for carnivorous plants, there needs to be something sacrificed, when they produce flowers, or severely compromised. Most of its energy is often focused on traps, or creating dew or fluid to capture and digest their prey. Once the flower stalk comes, then most of the energy is transferred to growing the stalks, and then the flower after it blooms. This slows down everything else, and it doesn’t always lead to the plant’s demise, but it will take longer for the main priorities to focus on capturing and consuming prey, because of the energy distribution.

This can be remedied, by allowing the flower stalk to grow maybe an inch or more, then cutting the stalk closest to the base of the plant, then you can either propagate it, or dispose of it. Successful propagation of this, I haven’t had this occur just yet; but when I do, I’ll discuss it in another journal. After cutting the flower stalk, the main priorities of the carnivorous plants can be focused on again, where the energy isn’t spent on growing flowers anymore.

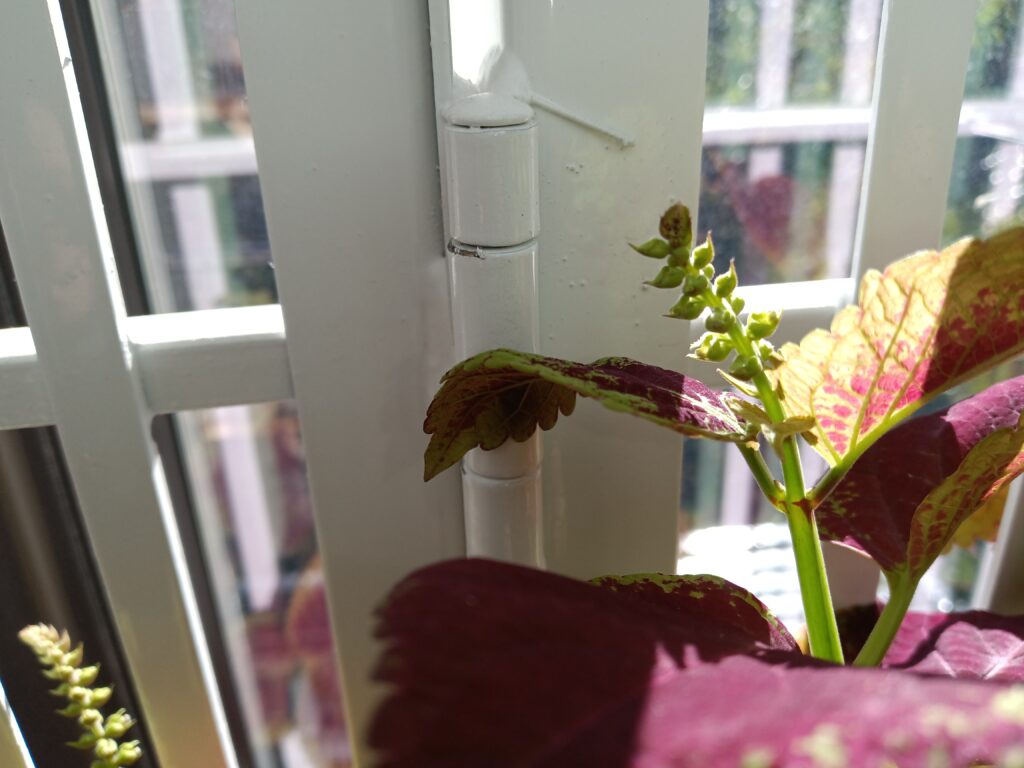
Other plants that have flowered quite well, are my coleus plants, where this took quite some time, because I didn’t have them under grow lights of any kind. It was direct sunlight only. This plant, which started out as two small plants. Now, as a result of propagations to produce many more additions, and repotting, eventually, this resulted in massive growth, and eventually, some flowers. These are my indoor window plants.

Understand, that most plants that can flower, will flower. Not all plant species can flower, but for the ones that do, it’s somewhat satisfying. Not all of the plants that flower will produced the best looking flowers. However, the job of those flowers, are often to attract insects that will aid in pollenating them. Just know that if you have an open window, and you all of a sudden have a problem with flies, bees, or even butterflies in your home, this is often why that is. If you have carnivorous plants, that problem can be solved, when those same bugs, end up becoming their meal; but I digress.

It’s safe to say that when you do see these plants flower, it can be satisfying to see them, but it can also show your success in growing them, to get them to this point, both naturally, and artificially.

Lighting.

When it comes to plants, they need the essentials, like water, and sunlight. In many cases, you can substitute sunlight with artificial lighting, to aid in plant growth.

You would be surprised of the types of artificial lighting you can choose from, to maintain, and to sustain plant growth. Many know of the handful of grow lights they have in the form of LED lighting, in a few different colors, often white, red, and blue. You have others that may just be white, with something else, that isn’t visible, nor optional to change. Some of them are quite simple, and I’ll get to all of those in a bit.

First light that I want to discuss are the lights often used before grow lights became available to most everyday users. They were called grow lights also, but they were of the bulb variety, not LED based. They were similar to the fluorescent lights we were forced to transition to in the early 21st century. I was first introduced to these types of lighting through AeroGarden, and this was something my mother had to grow some herbs and small vegetables. The lamp was multi-functional and the bulb was a part of this setup. It was good, because it had a built-in timer, that keeps the plants fully immersed in this artificial light, for around 12 hours. I used this for many plants to grow, but when they literally started reaching the lights, I had to move them. For the smaller ones, that didn’t have this issue, this stayed with them, until they couldn’t be maintained any longer.
They still have fluorescent grow light bulbs made available, but the likelihood of finding a good setup, with a timer may be the biggest challenge. Since then, the grow lights have been in a variety of differing types, not just the LEDs, but other types of bulbs. I have been using only a subset of grow lights, and most have been the LED types, that are promoted more times than not.

Let’s look at the smaller grow lights, the strips that only have one setting. Some of these, tend to be adaptable to USB outlets, to save energy off the bat. Some of these are quite inexpensive, some running around less than $10 on average. Many you can get at Amazon, and I’ve received a good set. There are some you can get from hardware stores, like Home Depot, and True Value. They will carry a variety, but the cost may be much more than you would expect. It is an investment, so be aware, you can start off cheap, but just know, sometimes the cheap ones can work nicely and for the long term, but it’s not a guarantee. When it’s time to upgrade, you can get some that can run as high as $200 and higher, while some can be around $50 or $60 each.

For the ones I received from Amazon, I received a few that worked out quite nicely. The first one was a three-head lamp with a clip rather than a stand. Actually, I ordered two of them, primarily to clip on or near the edge of the window sill. Each have timers, but they also had the USB connections with adapters. The adapters often will wear down, because unlike what most adapters are used for, they are short-term. That can be a problem, because long term use can make them overheat, and I’ve had one that just could no longer be used. It was burned out, in other words. That’s one thing you need to be aware of, when you get these types of LED lights, especially if they are semi-heavy duty. These cost me, somewhere near $20 total. These had timers, and intensity settings. It could also alternate from using either one, two, or all three heads at the same time. It’s flexible, both in the physical sense, and in other ways also. The issue for me, I detailed previously with the potential to overwhelm the adapters, where they can and will overheat, and potentially shut down. At times I’ve had this happen with one of them, and had to put the other on pause, and have it on standby, just in case. These I often used with, “the tank”.

The others I got from Amazon, and these were around $6.50 each, and I got three of them. These were single setting grow lights, where you plug them into an adapter, since they are USB compatible. They have an on/off switch, and that’s it. It’s bright enough to do the necessary, to give plants some needed light, where they often won’t get it, in certain areas.
These also have plant stakes that are removable, and there are ways that it can be used to be as an overhead setting. Here’s what I did:

When I got the option to get a curtain rod, because these are slim and light enough, I hung these, along with others much bigger, to get this advantage. I tied most of them with paracords, with certain types of knots, while also, using wire bag ties. This gives enough light exposure, where some plants, mostly small and single plants, will get what they need.
I’ve done similar with other grow lights, for the plants that cannot be near a window that exposes the plants to full and direct sunlight. The stronger, and better grow lights, I purchased for near $40 and $45 each.

The first one, which was about $40, costing about $38 and change, I hung from a curtain rod, and it covers most plants. It has a programmable remote control, where you can set it to several settings. Most settings are for seeding, vegetation growth, and flowering. It’s a full-spectrum LED lamp, and as far as I know, it’s not the type that shuts off automatically. That’s a manual on/off variety.

I’ve had many plants grow and even produce flowers, and this is added to the proper watering.

The one that was $45, nearing $50 with tax, I recently got, didn’t have a remote, but it had manual switches, to change the settings of the lighting. Each switch, was for each colored light. One for white, one for red, and one for blue. The types of combinations can be set from each light, either one, two, or all three, can be set, and also, the light has that manual on/off switch.

This one also resulted in most of my plants growing more, and producing flowers, or at least beginning growing flower stalks. Most of them being sundews of course.

For most of my carnivorous plants, that can deal with moderate humidity, these work quite well. So far, my VFTs, sundews, and sarrecenias, have done quite well, despite some light stress issues for some (the sarracenias especially) that lead to the leaves turning red. Some plants, the cape sundews especially, will develop dew much faster under these lights, and some like the spoon-leaved sundews will change from green to red. Not all will, some are temperamental like that, but most (if not all), will eventually develop dew quicker.
Now, the grow lights, are good to aid in giving light to plants, on dull days, or days with short sun exposure, and that’s an option I use for a few plants right now. They get both, but mostly how I have it now, the lights are on for much longer. The one with the manual individual light settings, I’ll keep on for a while, rarely shutting it off.

Most of these I will keep on for some time, not always 24 hours a day, but keep in mind, for most grow lights, they are low power, and you may not see a big hike in your electric bill. If you have a lot of them, and most of them do not run higher than 27 watts, so it will still be beneficial if you want to conserve energy. However, if you have a lot of them, it can still add up, and give you that unwelcome surprise in you electric bill, so be aware of that.

For some that have the option to use USB adapters, you can opt for using USB power banks to power these grow lights. However, they do drain these power banks quite fast. If they aren’t adjustable, they will drain faster than you would imagine. Some may only last about 30 minutes, others may last an hour or two, at best. If the grow light has programmable options, like changing the intensity, you may have the grow lights last for several hours to a day or even two. That’s likely to happen when the intensity is at its lowest. You may have to be present for these, because you won’t know when the power bank runs out of power, and the grow lights will power down, when you aren’t around.

There is an interesting hack that may work for some power banks, where you can charge the power bank, and power items at the same time. I’ve done this with a few grow lights in the beginning. I can still do that, for the USB types, but often you have to be present just to see what happens. Depending on the power banks you get, they may continue to work well, whereas others may not and could wear down, and not be seen as useful for this result.
Also, not all power banks work well with grow lights, and some will shut down after a few minutes, or worse, you’ll see and experience the fluctuation in the lighting emitted from the grow lights, and it will be tough for you to get used to it. This is why I say it’s an option, and not a preferred choice.

For the grow lights, it’s a matter of preference, but also convenience and usefulness. So you can do your own research, and do some trial-and-error to see what works for you.