Lighting.

When it comes to plants, they need the essentials, like water, and sunlight. In many cases, you can substitute sunlight with artificial lighting, to aid in plant growth.

You would be surprised of the types of artificial lighting you can choose from, to maintain, and to sustain plant growth. Many know of the handful of grow lights they have in the form of LED lighting, in a few different colors, often white, red, and blue. You have others that may just be white, with something else, that isn’t visible, nor optional to change. Some of them are quite simple, and I’ll get to all of those in a bit.

First light that I want to discuss are the lights often used before grow lights became available to most everyday users. They were called grow lights also, but they were of the bulb variety, not LED based. They were similar to the fluorescent lights we were forced to transition to in the early 21st century. I was first introduced to these types of lighting through AeroGarden, and this was something my mother had to grow some herbs and small vegetables. The lamp was multi-functional and the bulb was a part of this setup. It was good, because it had a built-in timer, that keeps the plants fully immersed in this artificial light, for around 12 hours. I used this for many plants to grow, but when they literally started reaching the lights, I had to move them. For the smaller ones, that didn’t have this issue, this stayed with them, until they couldn’t be maintained any longer.
They still have fluorescent grow light bulbs made available, but the likelihood of finding a good setup, with a timer may be the biggest challenge. Since then, the grow lights have been in a variety of differing types, not just the LEDs, but other types of bulbs. I have been using only a subset of grow lights, and most have been the LED types, that are promoted more times than not.

Let’s look at the smaller grow lights, the strips that only have one setting. Some of these, tend to be adaptable to USB outlets, to save energy off the bat. Some of these are quite inexpensive, some running around less than $10 on average. Many you can get at Amazon, and I’ve received a good set. There are some you can get from hardware stores, like Home Depot, and True Value. They will carry a variety, but the cost may be much more than you would expect. It is an investment, so be aware, you can start off cheap, but just know, sometimes the cheap ones can work nicely and for the long term, but it’s not a guarantee. When it’s time to upgrade, you can get some that can run as high as $200 and higher, while some can be around $50 or $60 each.

For the ones I received from Amazon, I received a few that worked out quite nicely. The first one was a three-head lamp with a clip rather than a stand. Actually, I ordered two of them, primarily to clip on or near the edge of the window sill. Each have timers, but they also had the USB connections with adapters. The adapters often will wear down, because unlike what most adapters are used for, they are short-term. That can be a problem, because long term use can make them overheat, and I’ve had one that just could no longer be used. It was burned out, in other words. That’s one thing you need to be aware of, when you get these types of LED lights, especially if they are semi-heavy duty. These cost me, somewhere near $20 total. These had timers, and intensity settings. It could also alternate from using either one, two, or all three heads at the same time. It’s flexible, both in the physical sense, and in other ways also. The issue for me, I detailed previously with the potential to overwhelm the adapters, where they can and will overheat, and potentially shut down. At times I’ve had this happen with one of them, and had to put the other on pause, and have it on standby, just in case. These I often used with, “the tank”.

The others I got from Amazon, and these were around $6.50 each, and I got three of them. These were single setting grow lights, where you plug them into an adapter, since they are USB compatible. They have an on/off switch, and that’s it. It’s bright enough to do the necessary, to give plants some needed light, where they often won’t get it, in certain areas.
These also have plant stakes that are removable, and there are ways that it can be used to be as an overhead setting. Here’s what I did:

When I got the option to get a curtain rod, because these are slim and light enough, I hung these, along with others much bigger, to get this advantage. I tied most of them with paracords, with certain types of knots, while also, using wire bag ties. This gives enough light exposure, where some plants, mostly small and single plants, will get what they need.
I’ve done similar with other grow lights, for the plants that cannot be near a window that exposes the plants to full and direct sunlight. The stronger, and better grow lights, I purchased for near $40 and $45 each.

The first one, which was about $40, costing about $38 and change, I hung from a curtain rod, and it covers most plants. It has a programmable remote control, where you can set it to several settings. Most settings are for seeding, vegetation growth, and flowering. It’s a full-spectrum LED lamp, and as far as I know, it’s not the type that shuts off automatically. That’s a manual on/off variety.

I’ve had many plants grow and even produce flowers, and this is added to the proper watering.

The one that was $45, nearing $50 with tax, I recently got, didn’t have a remote, but it had manual switches, to change the settings of the lighting. Each switch, was for each colored light. One for white, one for red, and one for blue. The types of combinations can be set from each light, either one, two, or all three, can be set, and also, the light has that manual on/off switch.

This one also resulted in most of my plants growing more, and producing flowers, or at least beginning growing flower stalks. Most of them being sundews of course.

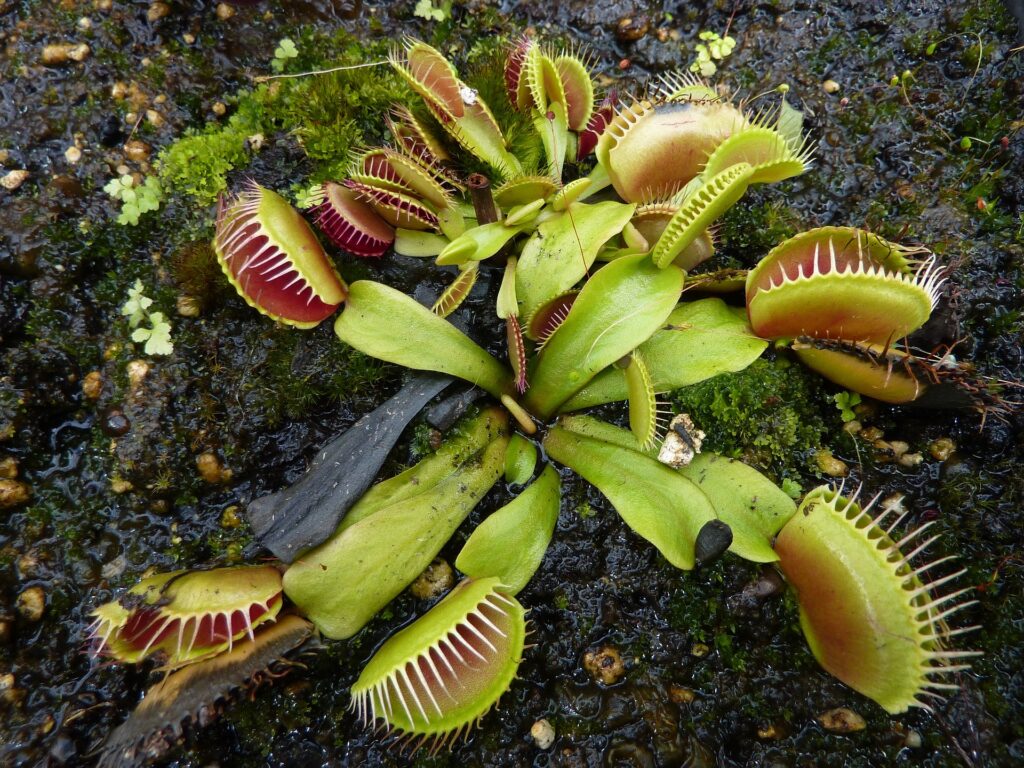
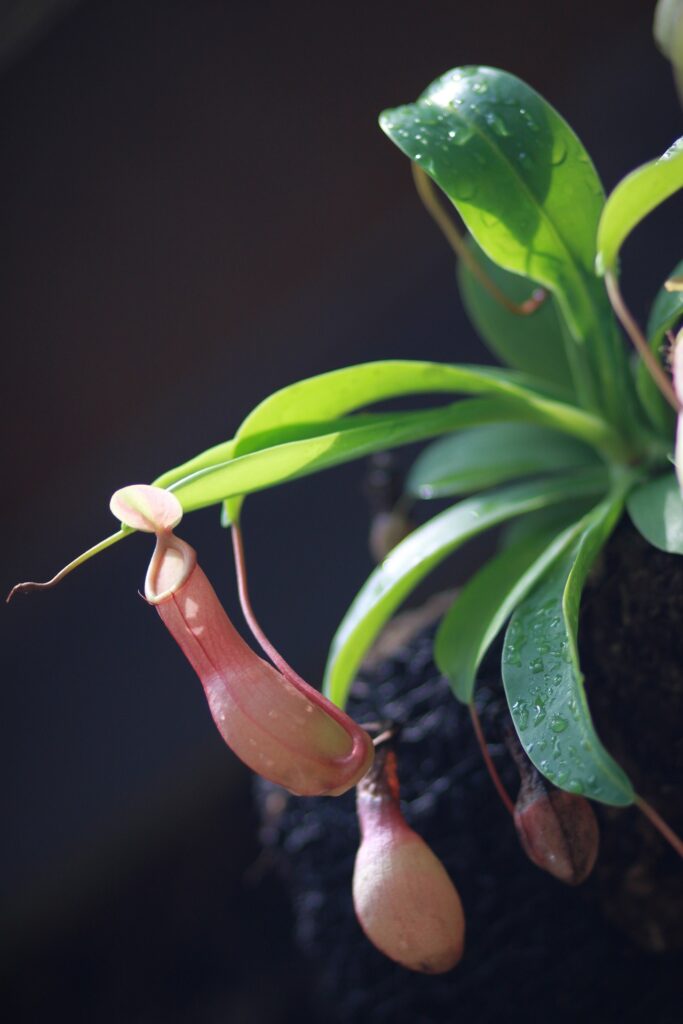
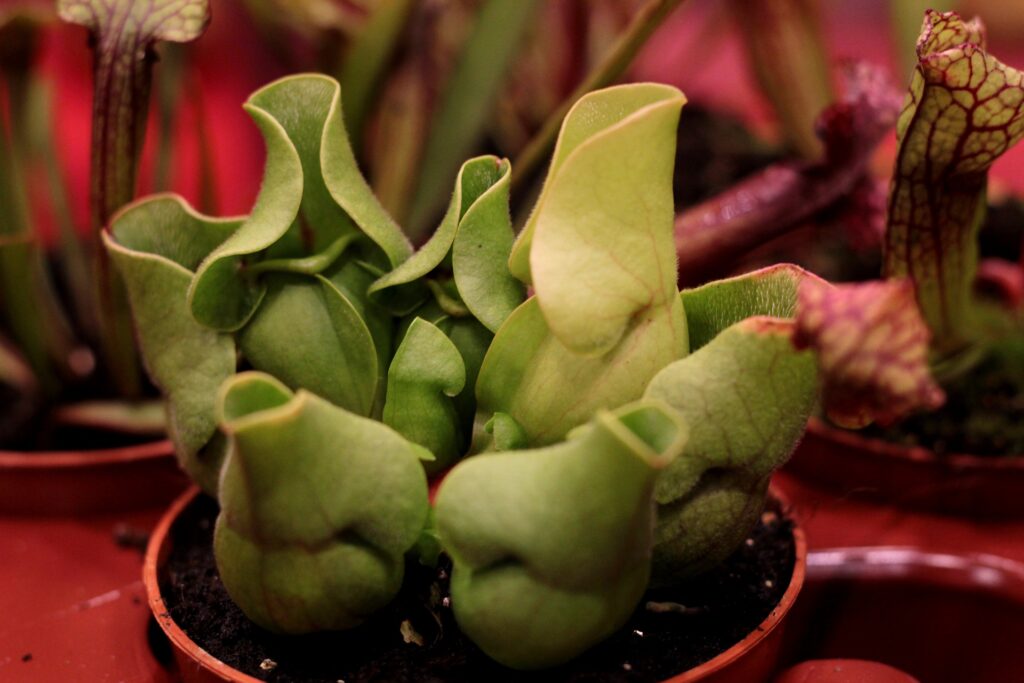
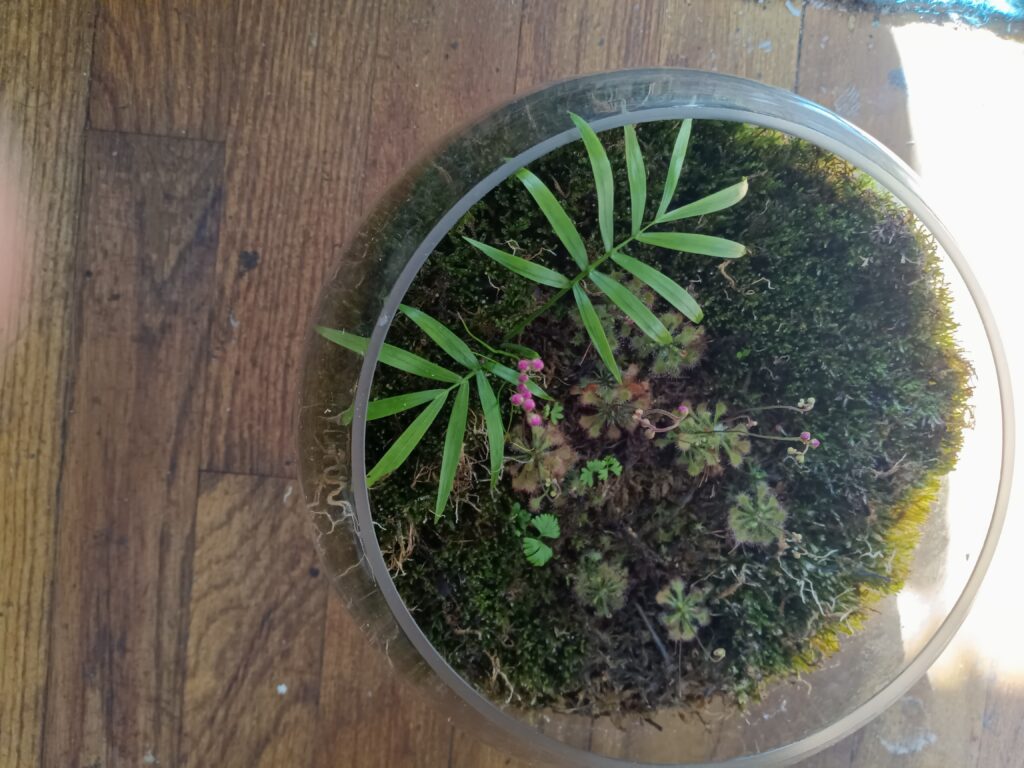
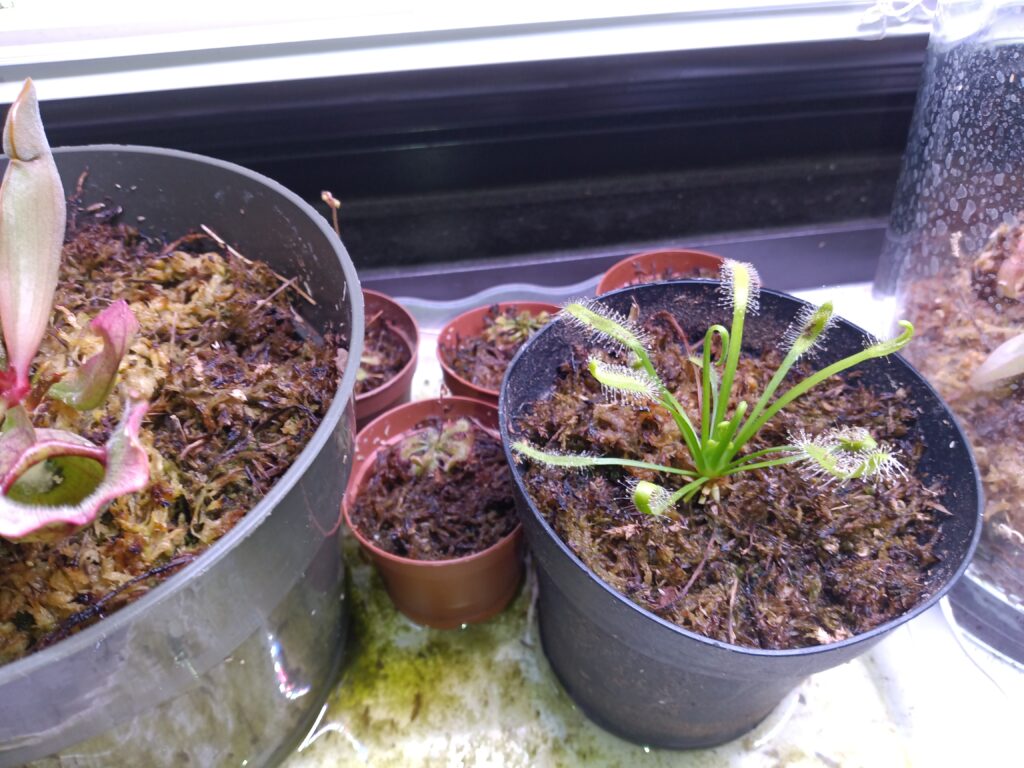
For most of my carnivorous plants, that can deal with moderate humidity, these work quite well. So far, my VFTs, sundews, and sarrecenias, have done quite well, despite some light stress issues for some (the sarracenias especially) that lead to the leaves turning red. Some plants, the cape sundews especially, will develop dew much faster under these lights, and some like the spoon-leaved sundews will change from green to red. Not all will, some are temperamental like that, but most (if not all), will eventually develop dew quicker.
Now, the grow lights, are good to aid in giving light to plants, on dull days, or days with short sun exposure, and that’s an option I use for a few plants right now. They get both, but mostly how I have it now, the lights are on for much longer. The one with the manual individual light settings, I’ll keep on for a while, rarely shutting it off.

Most of these I will keep on for some time, not always 24 hours a day, but keep in mind, for most grow lights, they are low power, and you may not see a big hike in your electric bill. If you have a lot of them, and most of them do not run higher than 27 watts, so it will still be beneficial if you want to conserve energy. However, if you have a lot of them, it can still add up, and give you that unwelcome surprise in you electric bill, so be aware of that.

For some that have the option to use USB adapters, you can opt for using USB power banks to power these grow lights. However, they do drain these power banks quite fast. If they aren’t adjustable, they will drain faster than you would imagine. Some may only last about 30 minutes, others may last an hour or two, at best. If the grow light has programmable options, like changing the intensity, you may have the grow lights last for several hours to a day or even two. That’s likely to happen when the intensity is at its lowest. You may have to be present for these, because you won’t know when the power bank runs out of power, and the grow lights will power down, when you aren’t around.

There is an interesting hack that may work for some power banks, where you can charge the power bank, and power items at the same time. I’ve done this with a few grow lights in the beginning. I can still do that, for the USB types, but often you have to be present just to see what happens. Depending on the power banks you get, they may continue to work well, whereas others may not and could wear down, and not be seen as useful for this result.
Also, not all power banks work well with grow lights, and some will shut down after a few minutes, or worse, you’ll see and experience the fluctuation in the lighting emitted from the grow lights, and it will be tough for you to get used to it. This is why I say it’s an option, and not a preferred choice.

For the grow lights, it’s a matter of preference, but also convenience and usefulness. So you can do your own research, and do some trial-and-error to see what works for you.

Types Of Plants I Care For.

There’s a good variety of plants that I care for, and it’s not easy, but it is fun and a great learning experience. I say this because not all of them can be cared for the same way, outside of sunlight (or grow lights) and water, and even that’s being somewhat general.
I have a good set of carnivorous plants, and let’s say, depending on where you get them from, they can be expensive, but if you know how to care for them, it’s a worthwhile investment.

Here’s a list of those that I have, and the difficulties that come with caring for them. For one thing, regular (tap) water is often a no-go for most (if not all) carnivorous plants. Instead, by default, use either distilled water, rain water, or reverse osmosis water.

The most common carnivorous plant that most of us know about is the venus fly trap, and in many cases, it can be not as easy to care for. Why is it tough? It’s not the humidity, generally speaking. It often does have issues of consumption of bugs, and dormancy due to cold weather exposure. Now, venus fly traps, or VFTs for short, can survive without eating bugs, and get good sun and hydration through clean and pure water alone (see previous paragraph). One thing about VFTs, is that they cannot eat too many bugs at once, or it will begin to struggle. This is why you are often recommended to not feed the traps, either with bugs, live, dead or freeze dried, all at once, but rather one or two at a time. The nutrients will increase a spike in growth potential, and lead to new traps surfacing, while the old traps will eventually die out, which is normal.

When it’s not normal, is when all of the traps, start to begin turning yellow, black or brown. That means something is not working right. If it’s yellow, it is leading to the leaf and trap it’s attached to, begin to die or is struggling. When all or most of the traps are shut due to eating bugs, it will be overworked, and some leaves will need to be cut, to reduce the work it’s doing. The ones to cut, should be the ones that are clearly the most yellow, black or brown, so that it relieves the VFT from all that work.

Not long after that, you should start to see some new traps growing. It should be maybe a week or two, before the traps should be fed again (ideally). It’s not always the case, so if you have issues with bugs, keep a close eye on the VFT, so that it does not get overwhelmed, and potentially ends up dying.

What also makes it tough to grow VFTs, is the likelihood of them going into shock, when changing environments. They need to acclimate slowly. When I say slowly, I mean weeks to a month, if you choose to repot; and I’m not referring to first arrival to potting, I’m referring to repotting, from one environment to the next. I mean a closed terrarium setting, to standard potting. The reasons revolve around the humidity changes, which may be too much for the VFT to adjust to, so it needs to go very slow in acclimation. This is true for pretty much all carnivorous plants that have this type of issue, because many are often best in humid or tropical climates, but if they are in a lower or moderate humidity situation, then they can still be okay. The problem comes where it goes back and fourth, usually when it’s from tropical to moderate or lower, it can result in these plants going into shock, and end up perishing as a result.

For most people that have VFTs, it’s often unlikely to have them for longer than a year. I’ve yet to have one to live that long, and I’ve owned overall at least between four and six, maybe more. Currently, I may have three, with one with a bit of rehabilitation, so if that doesn’t work, then the number will be two.

VFTs aren’t first ones I’ve been introduced to. However, I tried to get a few different ones, along with sundews, and nepenthes pitcher plants. I made the effort to get these all at once, but it was in the winter season, where most were supposed to go into dormancy. This didn’t lead them living that long at all.

Believe it or not, the nepenthes pitcher plants are the first ones I was able to get. The ones I got first, were the hanging pitchers, with the long basil shoots. Most cases, the pitchers can grow to about two to three inches to full size. There can be smaller traps, but that may be because of something that may be lacking, such as the humidity. More humidity will aid in getting bigger traps, and also feeding the traps will also lead to bigger overall growth of the plants.

These plants can survive without making traps, and I had one particular pitcher plant that stopped making traps for well over a year, and I even propagated some from the original one that I have. Maybe around a year and a half later, some very small traps began to form. Since then I did buy one more, and after a while, I separated the plants, which led to me having two new pitcher plants, along with the ones I have prior to these new ones.
I do have a smaller variety of pitcher plant, and since I recently got this one in mid October of 2023, it will be a bit before I can say what will happen. I do know this much. I’ve used sphagnum moss to plant them in, and it’s worked well for most of my carnivorous plants.
I have another plant that’s referred to as a pitcher plant, called the sarracenia. These are quite different, and I’ve had at least two, for at least a couple of months. They seem to be growing quite well. Every so often, I will manually feed a freeze dried mealworm to a pitcher, to aid in advancing their growth. They are growing quite well right now, and under a grow light, with some sunlight during the day. The grow light is there to compensate from the changes during the day, whether it’s cloudy, rain, snow, or the transition to shorter sun exposure.

So far so good.

I’ll elude to this in a focused journal about grow lights, but I do know this much, for the sarracenia plants, there is that issue of plants becoming red due to some light stress from the grow light settings, forcing artificially this result. It happens with other plants, and it can be seen as a problem, but not in all cases. I’ll keep a good eye on these plants to see what’s happening.

As far as the sundews, they can be easy to grow, but difficult if you don’t know what you’re doing. I can attest to both instances, because of the amount that I’ve gone through so far. Why do I say this is simple? My experience was to grow them in terrariums, where initially some would grow quite well, even to the point where some would even push flower stalks. Now, I can say this, the timing of purchasing sundews does matter, because there are specific seasons where they decide to push growing flowers. That would be in the summertime. Now, under grow lights, this can happen at anytime, depending on your settings.

I’ve been able to successfully grow as of late, cape sundews, and the spoon-leaved sundews.

The cape sundews seem to be the easiest to grow, and I can attest to this at the moment. All I did was place them in some sphagnum moss, in a small pot, and that’s it. Leave them near a window to get sunlight, with a grow light to make up for shorter daylight, keep them hydrated, and we’re good. Had them for a few months, and I’m seeing them develop dew from the light exposure.

I’ve begun feeding these plants with dried bloodworms, and it turns out these are a good source for food, when these cape sundews cannot catch its own prey. By the way, the type of cape sundews do vary, and the one that most know of, are the variety that turn red and develop dew. The ones I own, are of the white form where it doesn’t turn red, but stays green, with the leaves developing dew, and appears to be white on the leaves.
So far, so good.

The spoon-leaved sundews were the ones I got first, and were tough because of me keeping them in a terrarium, but also in keeping them clustered and not separating them. At the time, I didn’t know that they needed to be separated. Every time I received a plant, like a VFT, they would often be single plants, so I went by that as a template. After a while, you figure out, for most plants to survive after you purchase them, you need to separate and then repot them. I didn’t with my first set of spoon-leaved sundews, and they pushed flower stalks, which was the reason that I knew they needed to be separated.

My second set, I separated them, and they’ve been doing quite well ever since. I also kept them in open air pots, and not closed terrarium settings. For some, I have an open air terrarium, and they are growing well. Not only are they pushing flower stalks, but they have enough space to root individually and they also are developing dew and changing from green to red. When the leaves become red, it may also produce dew and be ready to consume prey on its own. Some aren’t turning red, but they are still doing well in their growth, while also producing dew. I’ll still keep an eye out for those that haven’t done this yet, but I do know that many of them have pushed flower stalks, which may slow that dew processing down a bit.

As far as tropical plants go, there are so many, and it will take a long time to get the names of those plants. I can name a few, but often they go the route of thriving in tropical climates. Terrariums, and plants that thrive in tropical climates, are a great combination. One terrarium that I have, I call, “the tank”, is a good area for those tropical plants to grow, and has been for a good year or so. Few plants will be in distress there, because they are getting hydrated through the constant humidity, and enough light from the grow lights.
Some of the plants I can name are as follows:

Parlor palms, string of turtles, “baby’s tears”, asparagus ferns, nerve plants (green/red and green/white varieties), “creeping figs” or “creeping Jennys”, and many many others I will identify and name later. Many of them can be acclimated in moderate humidity, and still grow quite well.

There have been a few that grow quite well in, “the tank”, where some will shoot for the stars, with their growth in that environment. When that happens, it leads me to remove them, and repot them in regular pots.

I also have at least one cactus that seems to be okay for the time being. Its needles are still very white and bright, and the flesh of the cactus is bright green. It’s planted in a simple peat moss, and watered weekly, or bi-weekly. It gets a bit of sunlight, so it’s doing quite well for now. Not much else can be said, other than, so far, so good.

I can say that I’ve had a few coleus plants, both of the green with red veins, and the red with green veins. Each started off small, being in plant pots of a small enough variety to be seen as what I call “starter plants”. This is how I started with these two plants, and I did start them growing in two settings. The greener one, at a dimly lit area, light only from a west facing window, and not much to be fair. The redder one, at the south facing window, with plenty of sunlight. The redder one grew fast, where the greener one was somewhat stagnant. So, I made a change for the greener one, and brought it to the window similarly to the redder one. It began to grow just as fast, if not faster.

Eventually I went to transfer those to bigger pots. Then, I propagated a few from both varieties of coleus, and it led me to moving them to bigger window planters, to hold several coleus plants. Many of them since has become bushy, and some are even starting to push flowers. It’s fun to watch this, and to see how easy it was to grow them to this point. From first purchase to the flowering stage, it took maybe six months or less.

When it grows so much, it takes a lot to water them. I’ve upgraded in spraying them with a simple trigger plant sprayer, to a pump sprayer, with a high enough capacity, to cover the entire set of plants. I do this for both window planters.

I have to add this one last, and that’s the variety of moss. First should be sphagnum moss, while the other will be sheet moss that I purchased locally. The one thing about moss, is that it can dry out, but also once it’s rehydrated, it can live and even aid in being helpful to the plants they are paired with, especially when it comes to hydration. I don’t know why this is, but it’s quite helpful so see it for yourself.

Often, moss is used as a decorative addition to many other plants, especially in terrarium settings. They can be used outside of them, however, depending on the imagination of the owner, you can do quite a bit with the moss.

Many can simply pick up wild moss from nearby outdoor settings, but if that’s not available, you can find and purchase them. I got a good set, for about $10 to $15, and it wasn’t even the entirety. Some stay dry, and most of it will, because they can be a bit much, so leaving them to be dry, will be fine. You can awaken them leaving them to soak in water for a while, but leaving it in various light settings will result in lighter, and pale colored moss, or darker green colored moss.

I’ve yet to make a separate moss display, with a small, fluffy moss in a pot, which is what some specialists often do. Maybe that’ll happen later.

I have to add to this sphagnum moss, because it’s dried, but not dead, and it’s used for a variety of uses, but mostly for a different option to soil. The long fibered variety, is dried enough so that it won’t (immediately) begin to growing and sprouting new growth. That can still happen, but it takes a long time, and with the right conditions.

I’ve had some proof that this can happen, but it takes a long time. If it’s completely enclosed, no air, you’ll develop not just shoots of green leaves, but also sprouts and algae. To avoid the algae, you may need to get some springtails or other insects that will consume the algae. Since I don’t have them, I need to do something slightly different.

I’ve chosen to do this in a different container, with some fresh sphagnum moss, in hopes of getting this result, without the algae. As time progresses, I’ll update this in the next journal.
This list may grow over time, and with other follow-up journals, I’ll detail what those are, along with the plants I couldn’t identify at this time.

My Failures With Plant Care.

I could easily go through this one, because there are so many. I put this here, not because of what I did wrong, but because the plants simply didn’t want to adapt, or because other catalysts left them unable to survive. Many unusual instances have occurred, where I found myself dealing with dying and eventually dead plants. Here are a few instances of these failures.

One failure was with a small air plant that I had, and it involved something I tried, with my tank setup. The humidity was perfect. It became green for some time, and was this way for at least a month or more. When it’s green, it’s getting what it needs, because they start off grey (or grey-ish) showing how dry, and in need of water and open air.

I tried one of the various methods of hydrating my plant, but I really didn’t need to. I’ll say this though, I noticed that the middle leaf on the plant was still brown, more like a rust color. That may have been an indication of the water used. This was the case before trying one of the other methods. After some time, I decided to let it dry out in open air, which was something I should have done more often. This is where things went downhill. I figured at the time, there was a loose leaf, and I pulled it off, only to notice some dark browning at the base. This was a sign of rotting. It didn’t end there. It happened with another leaf. Then another, and another, and another, until there was nothing left.

Now, considering how very dry my apartment is on a normal daily basis, it made sense this would happen. So, it may be a long time, before I decide to bring one of those back in again. Now, part of this result I attribute to keeping it in a humid environment for far too long. This may have resulted in the rotting of this, but whatever. Mistakes happen.

Another failure I can’t really attribute this to anything that I did wrong – not yet anyway. I had a couple of lavender plants, and for a while, they did okay. One was by the window sill with bright light, and the other was by another window, with low light. Neither survived after a month or two. Tried propagating them prior to their demise, and that backfired as well. You know it’s not working when you see the fuzzy mold envelope the entire stem; that’s not a good sign.

Were there others? Yes.

I’ve had several venus fly traps, and not all of them lasted very long. I had several and much of the failures came around the time I purchased them. What do I mean? I purchased and received them in January. Most plants, especially carnivorous plants, have a tendency to go dormant, where it appears to almost die, but it’s really not. Once it’s in a much warmer setting, dormancy may not occur.

Once I received my fly traps, and a sundew, I had so many settings. One by a window, with low daylight, and some in the tank setting, where they had lots of humidity and grow lights; this was my red dragon, typical VFT, and the sundew. All had their instances of growing well for some time, but after some time, they just didn’t. The one by the window, was a pinnacle, and it began to shoot up a flower stalk within a few weeks, just as the red dragon. The typical, didn’t really fair that well to push a flower stalk.

Trying to get these to grow further, for some reason was difficult, even in their settings where they grew quite well. The pinnacle, didn’t last, but I cut the flower stalk before things got worse. I may have waited too long to do so, because after that, it was gone within a couple of weeks. The red dragon faired a bit better, but I tried bringing it out sometime after I cut the flower stalk. Believe it or not, it lasted much longer than all of the others. The typical VFT somehow, just didn’t take, and eventually just died. The sundew, this particular one, was the most difficult of the rest, because I had to move it to another smaller terrarium setting where it could be dormant. It didn’t recover, and well, it was pretty much over with.
Long story short, for those in particular, it’s better to buy them in the spring and summer months, but there was one set of sundews that let me know it wouldn’t be easy. I tried again with this particular breed, and it started producing flower stalks right away. It stayed that way through the majority of its overall lifespan. This one I kept in a terrarium to keep the humidity up for it to grow, so that helped, but it also backfired, when I opened the terrarium to give it some air. This is where it began to dry up. I made one mistake prior to repotting them, which was to not separate them, so that aided in the cluster to not grow as well, after the flower stalks were cut.

After some time, that set of sundews were reduced to maybe one. For a cluster of sundews, generally you can separate maybe between eight or ten separate sundews. I realized this for the next time I went to get some more. That’s for another story, not in this section at this time. Anyway, that sundew reduced to one, eventually shriveled up, even after separating, and just didn’t recover. It had enough water, and sunlight, but it just didn’t want to survive.
A few have came and gone, and another I tried to grow, was the string of pearls. It’s a succulent type of plant, and it’s often best to hang them to grow long. For me, it did last for a little over two months. For a while, I had it under low light setting, but bright enough so that it got enough light from the window, but also from a nearby plant light (not a grow light). This was just fine, for a while.

Eventually, I tried another setting, which was my mistake. I put it to hang by the bathroom window, where it got humidity from the shower. If I did this from the beginning, I may have had different and better results. It wasn’t working so I brought it back to its original setting. It was still a bit stagnant, and eventually I saw it becoming a bit fuzzy, with the mold, clearly a bad sign.

A few weeks later, it was gone. All of the pearls dried up. When I saw this, it was time to call it a day.

I have a couple of cacti and I had my issues with at least one of them. Now, for the one that I was successful with, I won’t discuss here. What I will discuss, is the one that I failed with. I tried keeping this in a setting with sand and soil. I made separate layers, and hoped that the sand would be more suitable for it. It wasn’t. I saw the cactus browning, not just the needles, but the cactus with the green flesh turning brown. I think it’s safe to say, it was over for this one.

I had another prior to this, where I never repotted it, and that’s why it didn’t last.
Another, involving more venus fly traps. This involved me putting them in terrariums, but this time, the issue was more about acclimating them back to regular temperatures. Acclimation is a fairly slow process, and for this one, it wasn’t working because it was a bit too fast. Long story short, it died due to shock.

A different one died from shock, after I moved it from the tank setup, and although it was from that to a terrarium, it still didn’t take, and eventually stopped growing. I didn’t really notice until I didn’t see the traps forming, and I went to take a closer look, only to see clear rotting at the base. There goes that.

With the many failures here, many lessons were learned. One thing to understand, is that carnivorous plants aren’t that easy to grow, for long periods. If you keep them in constant conditions, you could have them for several years. I’ve yet to have that result, but I’m working on it. As for the plants that didn’t work out, just know that some plants simply don’t like where they are growing. Once you find out why they won’t work out, you can then decide whether or not you should pursue replacing them, and doing so, with different ways or placement for growth.

Hopefully, there won’t be that many more stories of failures, but only time will tell.